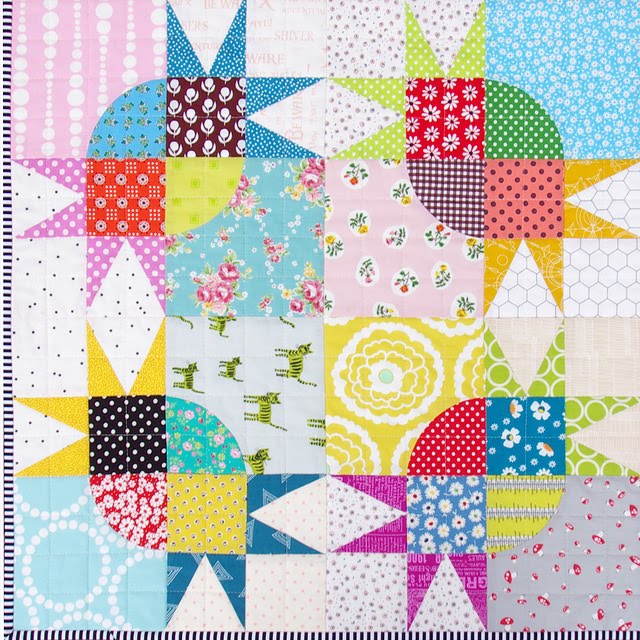
The custom Strips and Bricks Quilt is very much finished and in between showers and windy weather I have managed to take lots of photos. So herewith a picture post: ~
This quilt is based on the Strips and Bricks Quilt Pattern by Malka Dubrawsky and was featured in the Sew Hip Magazine (April 2009), although I have tweaked block size to accommodate the larger quilt size.
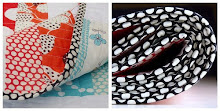
As usual the back of the quilt is also pieced and incorporates more of the Strips and Bricks Pattern as well as featuring some much loved Amy Butler Lotus prints. The solid fabric is Robert Kaufman Kona Cotton in Ash.
The quilt is quilted with straight lines from edge to edge of the quilt, both vertically and horizontally. Where the quilting lines cross paths a very busy intersection of stitches is created. Avoiding tucks and puckers at this point comes down to good basting. I pin baste and use lots of pins; at least one pin every four inches. I do think that basting is something you get better at over time. You eventually get a "feel" of how to match the tension of the top and back of the quilt. (I hope to write a more thorough basting technique post soon.)
When quilting I do increase the stitch length so that the stitch itself is a feature. This particular quilt was quilted with a stitch length of 4.0 (Bernina 440QE) compared to a usual piecing stitch length of 2.0. I do adjust stitch length according to quilt size; larger quilts can cope with longer stitches. My usual choice of quilting stitch length ranges from 3.5 to 4.0. Larger stitches also makes stitch ripping a little easier.
Straight line quilting is time consuming with this particular quilt taking approximately 12 hours to quilt and 6 bobbins. It gets boring after about 1 hour so a little patience and determination is definitely required. The overall effect is well worth the effort though.
This quilt is now off its new owner. It is difficult to part with this one, although I take great comfort in knowing that this quilt will be very much loved and used.
Rita
Rita


That quilt is simply gorgeous!
ReplyDeleteLove it! :)
ReplyDeleteSo very beautiful!
ReplyDeleteI love how you explain things - it helps me a lot! :)
ReplyDeleteIt's beautiful! Your fabric mix is awesome as usual!
ReplyDeleteThe new owner is a very lucky person. The quilt is wonderful. All the straight-line quilting! I would probably lose my mind before I finished all that stitching. It really is perfect for the quilt, though.
ReplyDeleteThis quilt is really beautiful. Thanks so much for all the info about how you quilted it. I love straight line quilting.
ReplyDeleteGorgeous Rita! I wondered of you increased your stitch length because your stitches always look quite small in the photos. It's good to know they're not because there's no way I could quilt anything without increasing the length considerably!
ReplyDeleteRita - the quilt is gorgeous. I absolutely love straight line quilting! I would have a hard time parting with that too!!
ReplyDeletethat is to die for!! i love it! in fact, i just dug up my copy of sew hip, and am planning my own! this will be for my soon to be bub- so i have about 8 weeks to get it done : )am going to be using lots of Japanese linen fabric, so cant wait to get cutting!!
ReplyDeletethanks for the inspiration, hope my turns out half as good as this one
x
Gorgeous quilt!! I love the back particularly, because it shows off your fabulous quilting really well.
ReplyDeleteMy oh my it's spectacular!!! xt
ReplyDeleteThat is truly beautiful, and I just know the lucky recipient will be very happy with it! It is so hard to let them go, though - I just finished a two-day quilting job on one and it was very hard to let it go to its new owner!!! Thanks so much for sharing!
ReplyDeleteIts stunning Rita! I've been collecting fabrics for a similar type of quilt!~ May I ask what size blocks these you used for this one? And did you literally piece each block instead of using any shortcuts like strip-piecing? Just wondered :-)
ReplyDeleteWonderful finish and very effective quilting! The new owners are sure to love it!
ReplyDeleteGah - that is fantastic! Love reading all your little quilting tid-bits of knowledge, as it is something I want to try very soon.
ReplyDeleteReally stunning quilt. And thank you so much for the info tidbits such as stitch size, etc. I'm interested as well in whether how you put it all together. Thanks again!
ReplyDeleteAs per usual, you are Ye Veritable Font of Quilty Knowledge. As well as INSPIRED! Utterly gorgeous stuff.
ReplyDeleteBeautiful quilt!
ReplyDeleteSimply gorgeous and VERY inspiring!! I am going to use this method for my next quilt!
ReplyDeleteThis is just gorgeous. You do beautiful work. I've got a quilt that I need to re-baste right now. I think I'll try pins. I did a basting stitch first time around and didn't get the top tight enough. After about seven or eight rows and columns of stitching I finally had to admit it wasn't right and set to ripping out the stitches...
ReplyDeletethis is so so beautiful..i love the color
ReplyDeleteA beautiful quilt and thanks for the explanation of the stitch sizes, and how to make sure the quilt doesn't pucker when quilting in this way.
ReplyDeleteLove your work Mrs!!!
ReplyDeleteBEAUTIFUL! I love this pattern - another great design Rita.
ReplyDeleteI love this!
ReplyDeleteyour quilting is just so perfect Rita. I don't know how you do it. I aspire to such perfection and I'd be over the moon if my quilting looked like yours!
ReplyDeleteOH I love this one - need to get out my copy and make one....the quilting just makes it amazing!
ReplyDeleteStunning quilt Rita - both the front and back are divine. I particulary like how the quilting looks on the back.
ReplyDeleteI adore this quilt. The fabrics, the piecing, the quilting, everything about it is amazing. I love how you can see the intersection of quilting in the back.
ReplyDeleteI have the same sewing machine and use the same stitch lenght, funny huh?
Another beautiful quilt! Your work is lovely and I don't know how you can part with it! Suz
ReplyDeleteOh I have to say I LOVE that quilt & the quilting (I like the longer quilt stitched too!). You have the most amazing fabrics! I always enjoy seeing what you make.
ReplyDeleteI do love this one, but I think your backs are too good to be backs, they would make great fronts!!! Fabulous quilting, it was worth the boredom factor! xo
ReplyDeleteJust gorgeous! Your quilting is amazing and looks sooo perfect. I'd never dare straight line quilting as it would show up just how wonky my piecing is :)
ReplyDeleteOoooh, I love it just as much as your banner quilt!
ReplyDeleteI'm glad you want to write a thorough basting technique post. I think I have no idea what you mean about the tension between the top and bottom! Lots to learn, for sure. Looking forward to it.
ReplyDeleteI love the white, it really opens up the quilt. The colors are very clean looking, I like that.
ReplyDeleteI absolutely agree with your comment about basting, it all starts there. The more safety pins the better!
The quilting is gorgeous, lines take alot longer than one would initially think!
Beautiful!
that pattern that the quilting lines make on the quilt back is very beautiful. you've done a wonderful job.
ReplyDelete